

Why Self-Host n8n?
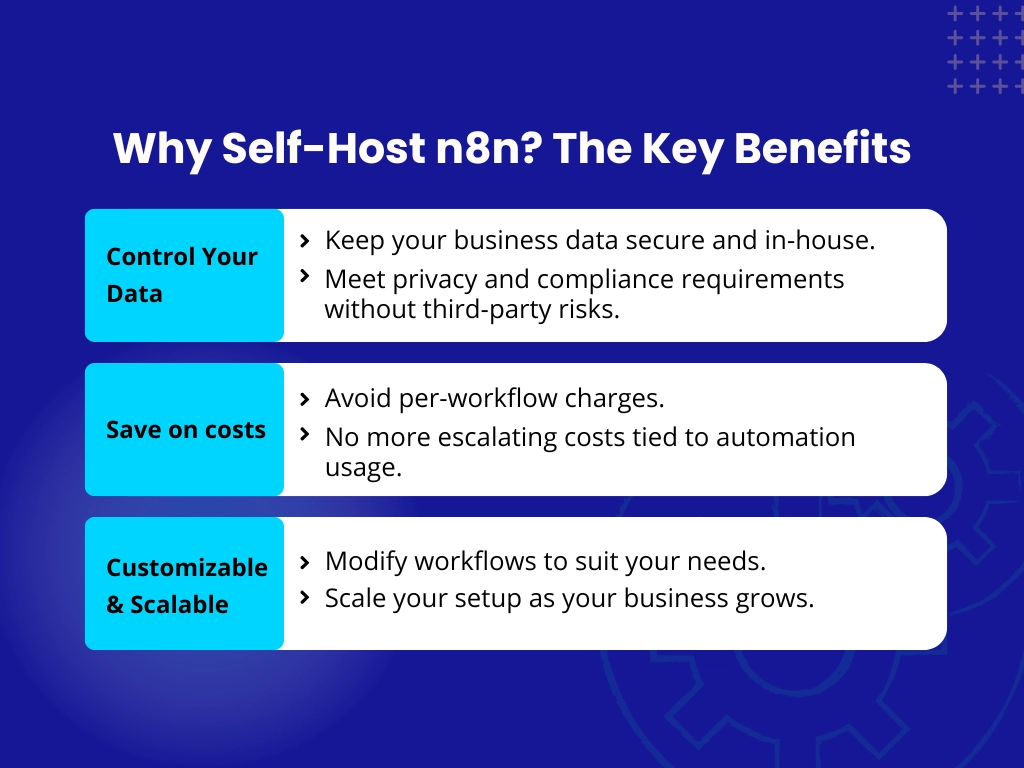
Most automation tools come with hidden fees, making it difficult for businesses to scale affordably. By self-hosting n8n on your own server, you gain full control over your workflows and data. You can automate as much as you need without worrying about surprise bills or subscription costs.
In this guide, we’ll walk you through how to set up n8n on your own server using Docker. It’s quick, simple, and requires no technical expertise.
Why Self-Host n8n? The Key Benefits
Prerequisites for n8n Installation
n8n Self-Hosting Requirements
- A server or VPS (e.g., DigitalOcean, AWS, or your own hardware).
- Docker and Docker Compose installed.
- Basic knowledge of terminal commands (don’t worry, it’s simple).
Step-by-Step Process of How to Set Up n8n on Your Own Server

Using Your Self-Hosted n8n Instance
Access the n8n Editor
Open your browser and visit http://<your-server-ip>:5678
Log in and start creating your first automated workflow.
Create Your First Workflow
Use n8n’s drag-and-drop interface to build workflows. Connect apps like Google Sheets, Slack, and CRM systems to automatically execute tasks.
Troubleshooting Your n8n Setup
Common Issues and Fixes
- Ports already in use?
Run sudo lsof -i :5678 to find the process and kill it. - Docker Compose not recognized?
Ensure Docker is installed and running properly. - Workflow not triggering?
Double check webhook URLs and triggers.
What’s Next? Start Automating!
Connect Your Apps
n8n offers hundreds of integrations to connect your CRM, marketing tools, and data platforms. Set up triggers and actions to create custom workflows.
Conclusion: n8n is Better to Host It Yourself
Self-hosting n8n gives you more control, privacy, and cost savings. It’s the smart way to scale workflows without worrying about per-use charges. Once set up, you own the system and can scale it as your business grows.
Want to master your workflows? Contact us at Autonomous if you need help setting up and optimizing your business automations.